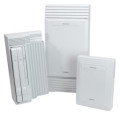
Nortel Norstar Business System

Nortel Integrated Communications Portfolio is comprised of telephony solutions for small-to-medium businesses and branch offices, with growth up to 248 ports (192 stations). This fully digital platform brings together all your communications - voicemail, fax, email, computer and telephone - right at your desktop. Advanced integrated applications include enhanced call centers and computer telephony integration.


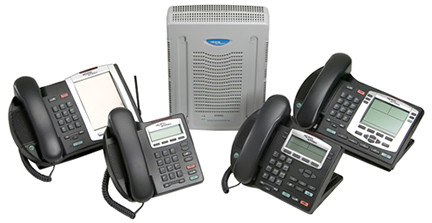

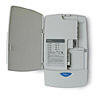
CICS and MICS Systems
For larger or multi-site businesses that need sophisticated capabilities, Nortel Norstar Modular Integrated
Communications System, our premier Norstar platform, grows to support up to 280 ports in various configurations. Software and system expansion modules enable you to grow as your business needs
change, both in capacity and features. For example, you could start with basic voice messaging, then add desktop messaging, add enhanced call center services or take advantage of networking to deploy
telephony applications in one place yet extend capabilities to many locations.
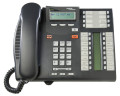
The Norstar Modular Integrated Communications System (ICS) is a key system designed for growing small-to-medium businesses and is expandable up to 248
ports. Advanced integrated applications include voice messaging, unified messaging, digital networking, enhanced call centers and speech recognition. The Modular ICS can grow with your business
through the addition of trunk and station modules as you need them.
Key Features:
- High bandwidth to the desktop enables you to use applications like ISDN and CTI without changing your existing wiring.
- Modular, scalable design lets you choose the system that fits your needs today, while planning for the future.
- Digital technology creates a platform for current and future PC-based applications.
- Wide range of call processing and call handling features designed to drive productivity and profitability into your business.
- Reliability with one of the highest mean time between failures in the industry over 100 years.
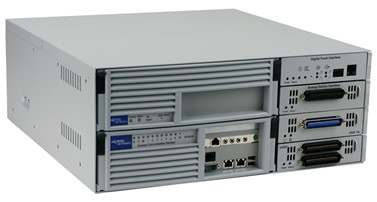
CallPilot Voice Mail Automated System
CallPilot 100/150 Basic Contact Center for both the CallPilot 100 and 150
platforms is compatible with the Norstar Compact and Modular Integrated Communications Systems.
This Call Center supports 20 configured agents, 2 skillsets, 20 routing steps/skillset, 30 built-in announcements, 15 lines, 2 skillset mailboxes, 20 Intelligent overflow
rules/skillsets, 15 simultaneous incoming calls in the system, and all agents can be supervisors. Reporting package shows real-time statistics, historical statistics, and supports hardware and
software wallboards.
Key Features:
- Contact Center is a key-coded option requiring no additional hardware.
- Keycode obtained separately from CalPilot 100.
- Keycode packaged with CallPilot 150.
- Fully functional informal Contact Center featuring Call Queuing, Routing, Reporting, and Supervisory Functions.
- Skill-based routing ensures the caller gets the appropriate support person for call center functionality in a small business environment.
- Intelligent Overflow rules for each Skillset.
- Real-time and historical reporting for accurate detailed reports.
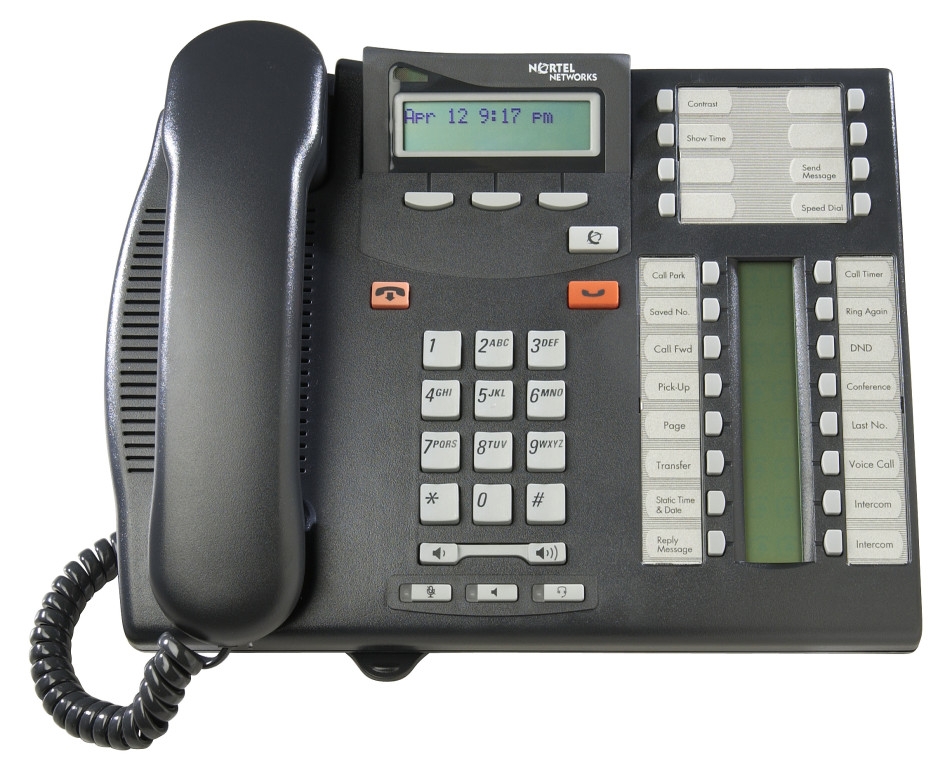
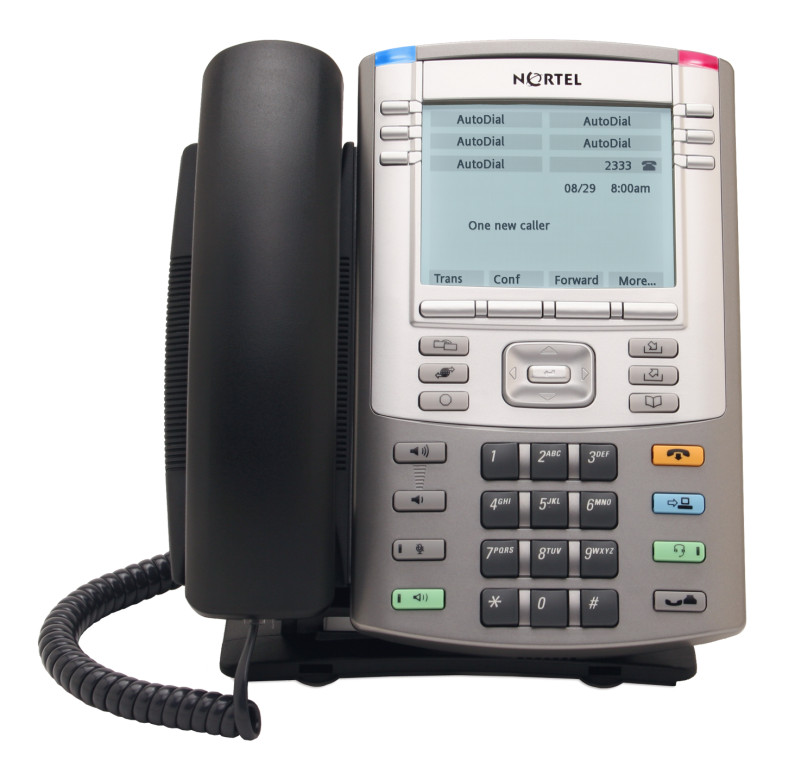
Common Norstar
Telephone Features
To
Call an Extension:
1. Lift handset or press an INTERCOM
key
2. Dial the extension
number
To Use Voice
Call:
1. Lift handset, press Voice Call key or press the Feature button, then press
66
2. Dial the extension number
*If person is on the phone, Voice Call will not work
To Call an Outside Line:
1. Lift handset or press INTERCOM key
2. Dial "9" followed by the telephone number
(Depends on system configuration, may not be applicable.
To Place a Call on
Hold:
1. Press the hold key
To Retrieve a Caller Held on Your
Phone:
1. Lift handset
2. Press the INTERCOM key or line button that has the flashing triangle next to
it
To Transfer a Call:
1. While a caller is on the line, press the softkey under the word TRANSFER in
the LCD display or Feature 70
2. Dial the extension number of the person you are transferring to
3. You may announce the call at this time by waiting for the called party to
answer
*Press the JOIN softkey to complete the transfer
*Press the RETRY softkey to enter a different extension
*Press the CANCEL softkey to return to the caller
To Park A Call (Puts a call on hold so that it can be picked up from any
telephone on the system:
1. While a caller is on the line, press the CALL PARK key or press the Feature
button, then 74
2. Look at the display to see where the call is parked, the display will show a
3 digit park code
3. Hang up the receiver
To Retrieve a Parked Call:
1. Lift handset or press the INTERCOM key
2. Dial the park code (Example 101, 102.
To Page:
1. Lift handset
2. Press the PAGE key or press the Feature button, then 611
3. Make your announcement
4. Press the release key
To Turn On or Off Do Not Disturb:
1. Press the DND key or press the Feature button, then 85
2. To turn it off: Press the DND key or the Feature button, then #85
To Make a Conference Call:
1. Make or receive the 1st call
2. Press the Hold key
3. Place 2nd call
4. Press the Conference key or press the Feature button, then 3
5. Press the INTERCOM key next to the held first call
To Pickup a Specific Ringing Extension:
1. Press the Call Pickup key or press the Feature button, then 76
2. Dial the extension you want to pick up
To see the Call Duration Timer:
1. During your call or just after your call
2. Press the Feature button, then 77
*This will show you a "static" duration of your call
To Use Last Number Redial:
1. Press the Last No. Redial key or press the Feature button, then 5
*This will redial the last number you called
To Check to See What is Programmed On a Particular Button:
1. Do a "Button Inquiry" by pressing the Feature button, then * 0
2. Hit the button you want to check and it will show in the display what is
programmed there
Norstar Phone - Program Your Norstar Telephone
To Program Buttons On Your
Phone:
For External Numbers:
1. Press the Feature button, then * 1
2. Push the button you want to program
3. Display will read "Program and OK"
4. Enter the telephone number, then press the OK softkeyFor Internal Numbers
(Extensions.:
1. Press the Feature button, then * 2
2. Push the button you want to program
3. Display will read "Intercom #:__"
4. Enter the extension number
For Feature Codes:
1. Press the Feature button, then * 3
2. Push the button you want to program
3. Press the Feature button then enter the Feature Code
To Change the Contrast of the Display:
1. Dial the Feature button, then * 7
2. Press the number keys 1 – 9 to your desired brightness level
3. Press the OK softkey
To Change your Ring Type:
1. Press the Feature button, then * 6
2. Press the number keys 1 – 4 to hear the different ring types
3. Press the OK softkey when you hear your desired ring
To Change the Ring Volume:
1. Press the Feature button, then * 80
2. Press the volume key up or down
3. Press the release key1 to exit and save the volume level
To Program Personal Speed Dial Numbers: (Numbers 71 – 94 only.
1. Press the Feature button, then * 4
2. Enter the 2 digit code (71 – 94. that you want to assign to that phone
number
3. Enter the telephone number, then press the OK softkey
4. Display will show: "Entry xx stored"
Voicemail
Features
To Check Your Voicemail:
1. Press the Check Voicemail key or press the Feature button, then 981
2. Enter your password
3. From here you can listen to messages, change your greeting, change your
password, etc.
To Leave a Message for Someone in Your Office:
1. Press the Leave Message key or Feature 980
2. Enter the mailbox number (extension number. of the person you want to leave
a message for
3. The display will show the name of the mailbox owner, press OK
4. Leave message
To Access Your Voicemail box from Another Phone:
1. Press the Check Voicemail key or press the Feature button, then 981
2. Press the OTHER softkey
3. At the LOG: prompt, enter your mailbox#(extension #. and your password all
together followed by the "#" sign
4. Press the OK softkey
To Access Your Mailbox from Outside of the Office:
1. Call the main office number or your DID (if applicable.
2. If the call is answered by a receptionist, have them transfer you to your
voicemail box
3. If the call is answered by the company greeting, or your personal greeting,
Enter: * *
4. At the prompt, enter your mailbox #(extension #. and password all together
To Transfer Someone to a Voicemail Box:
1. Press the Transfer to Voicemail key or press the Feature button, then 986
2. Enter the mailbox # (extension#.
3. The display will show: Call Transferred
To Change Your Personal Greeting:
1. Press the Check Voicemail key or press the Feature button, then 981
2. Enter your password
3. Press the ADMIN softkey
4. Press the GREET softkey
5. Press the REC softkey
6. Press the PRIME softkey
7. Press the YES softkey
8. At the tone, record your new greeting, press the OK softkey to end your
recording and then the OK softkey again to accept the new recording
To Record Your Alternate Greeting (Used when on vacation or out of the
office.:
1. Press the Check Voicemail key or press the Feature button, then 981
2. Enter your password
3. Press the ADMIN softkey
4. Press the GREET softkey
5. Pres the REC softkey
6. Press the ALT softkey
7. Press the YES softkey
8. At the tone, record your new greeting, press the OK softkey to end your
recording, then the OK softkey again to accept the new recording.
9. You then need to have your voicemail box now play the Alternate Greeting,
Press the GREET softkey
10. Press the ChOOSE softkey
11. Press ALT softkey
12. Display will show: "Accept msgs: Y", Press the OK softkey to have
your voicemail box accept messages while your Alternate Greeting is turned on,
or press the CHNG softkey to change the "Y" to an "N" if
you do not want your voicemail box to accept messages.
13. When you return to the office, make sure you go back into your voicemail
box and have it play the PRIME greeting
3. Press the softkey under "OK"
To Change the "Recorded" Name for the Company Directory:
1. Have the Voicemail User log into their mailbox, after putting in their password,
press the button under "Admin" (or press the number 8 key., and then
press the number 1 key.
2. You will hear the old recorded name and then the system will
"beep", prompting you to record a new name (name only here, not
greeting..
3. Press "Ok" in the window when you are done recording and then
"Ok" again to accept the recording.